So, I’ve been using my Mustang less and less this spring. I prefer not to take it out in nasty weather. Here in Minnesota, we haven’t really had much nice spring weather, and if there’s even a chance of hail or sleet, I take steps to leave the car in its sheltered little garage sanctuary. So, when I noticed a slight grinding sound from my brakes when I first would start out from the driveway, I figured it was probably some rust that had formed on the brake rotors. Still, when it comes to the mechanism that helps you stop or slow down, you really ought not to take any chances. Besides, I figured this might make a nice posting, and there was a little something I wanted to do anyway, so I decided it was time to do some brake work.
Let’s visit our brakes. Here’s where they live -behind the wheels.

A car’s front brakes handle the majority of the slowing and stopping work, so they’re significantly larger and more powerful than rear brakes and will also wear out sooner than rear brakes.

Before we do any heavy lifting, it’s a good idea to loosen the lug nuts that keep your wheels from flying off while driving. In this photo, I’m just putting a socket on the locking lug nut (a set of these are a good idea if you value your rims at all), but usually you’d use a tire iron to do this. Most cars come with one that you can use if you don’t have a lot of tools.

Now that the lug nuts are loose, lets jack up the end of the car we’re working on. Ideally, you should position jack stands in place on each side rather than just using the jack to suspend the car. I did this while traveling to visit my folks and forgot to pack my jack stands, so that’s why you won’t see any in this posting. Since I’m not going to be underneath the car at all, it’s really not a big deal, but if you ever are doing work that requires you to get under the car then definitely use jack stands.
Lets get that wheel off, shall we?

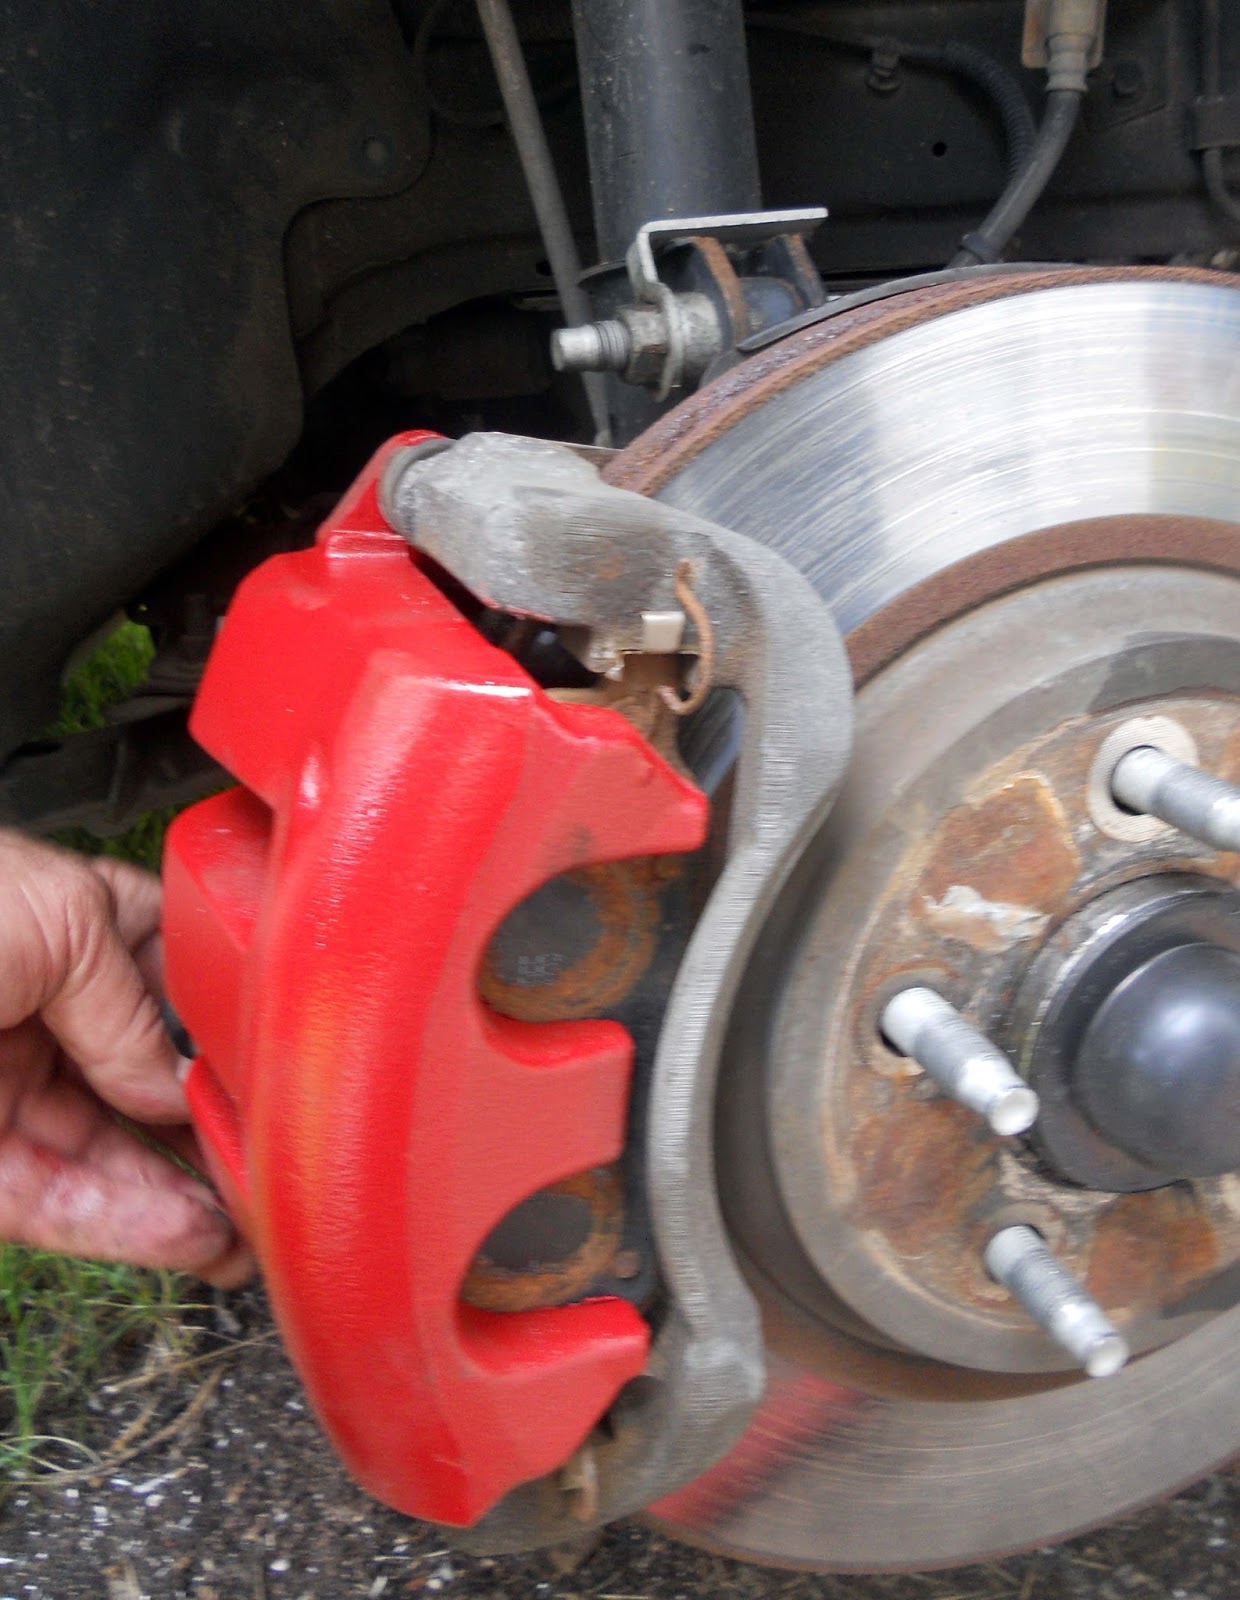
What do we have here? This is a disc brake. Well, that round thing that looks kind of like a record is called a rotor. That thing stuck to the right side of the rotor is the caliper. The caliper wraps around both the front and back side of the rotor and contains a piston or two (in this case, two) that push against some little slabs of tough, hard compound that can be made from ceramics, metal, or if you want to go all hippy dippy about it, even crushed walnut shells -years ago, asbestos was also a component, but that‘s just no good for people, so it‘s no longer available -anyway, these slabs are called brake pads, and there is one on each side of the rotor. If you are replacing your brake pads, try to get ceramic ones. They work better and create less brake dust than other varieties.
What happens with disc brakes is that when you push on the brake pedal, the pistons push against the brake pads, which in turn squeeze the rotor. The rotor is attached to the same lug studs as the wheel, so when the rotor slows, so does the wheel, and so does the car. If more illustration is needed, take a compact disc, and put your index finger through the hole in the center then spin it around. With your other hand, make a “C” shape with your thumb and index finger and put them on either side of the spinning disc. Then squeeze them together. This will cause the disc to stop spinning. That’s how disc brakes work.
Now that we know all that, take a flat head screwdriver and use it to pry the brake pads back from the rotor a bit. Don’t wedge it between the rotor and the pad, but angle it so it’s against the steel base part of the pad rather than the braking compound area, then pressure it back just a bit. This will make it easier to pull the caliper off.

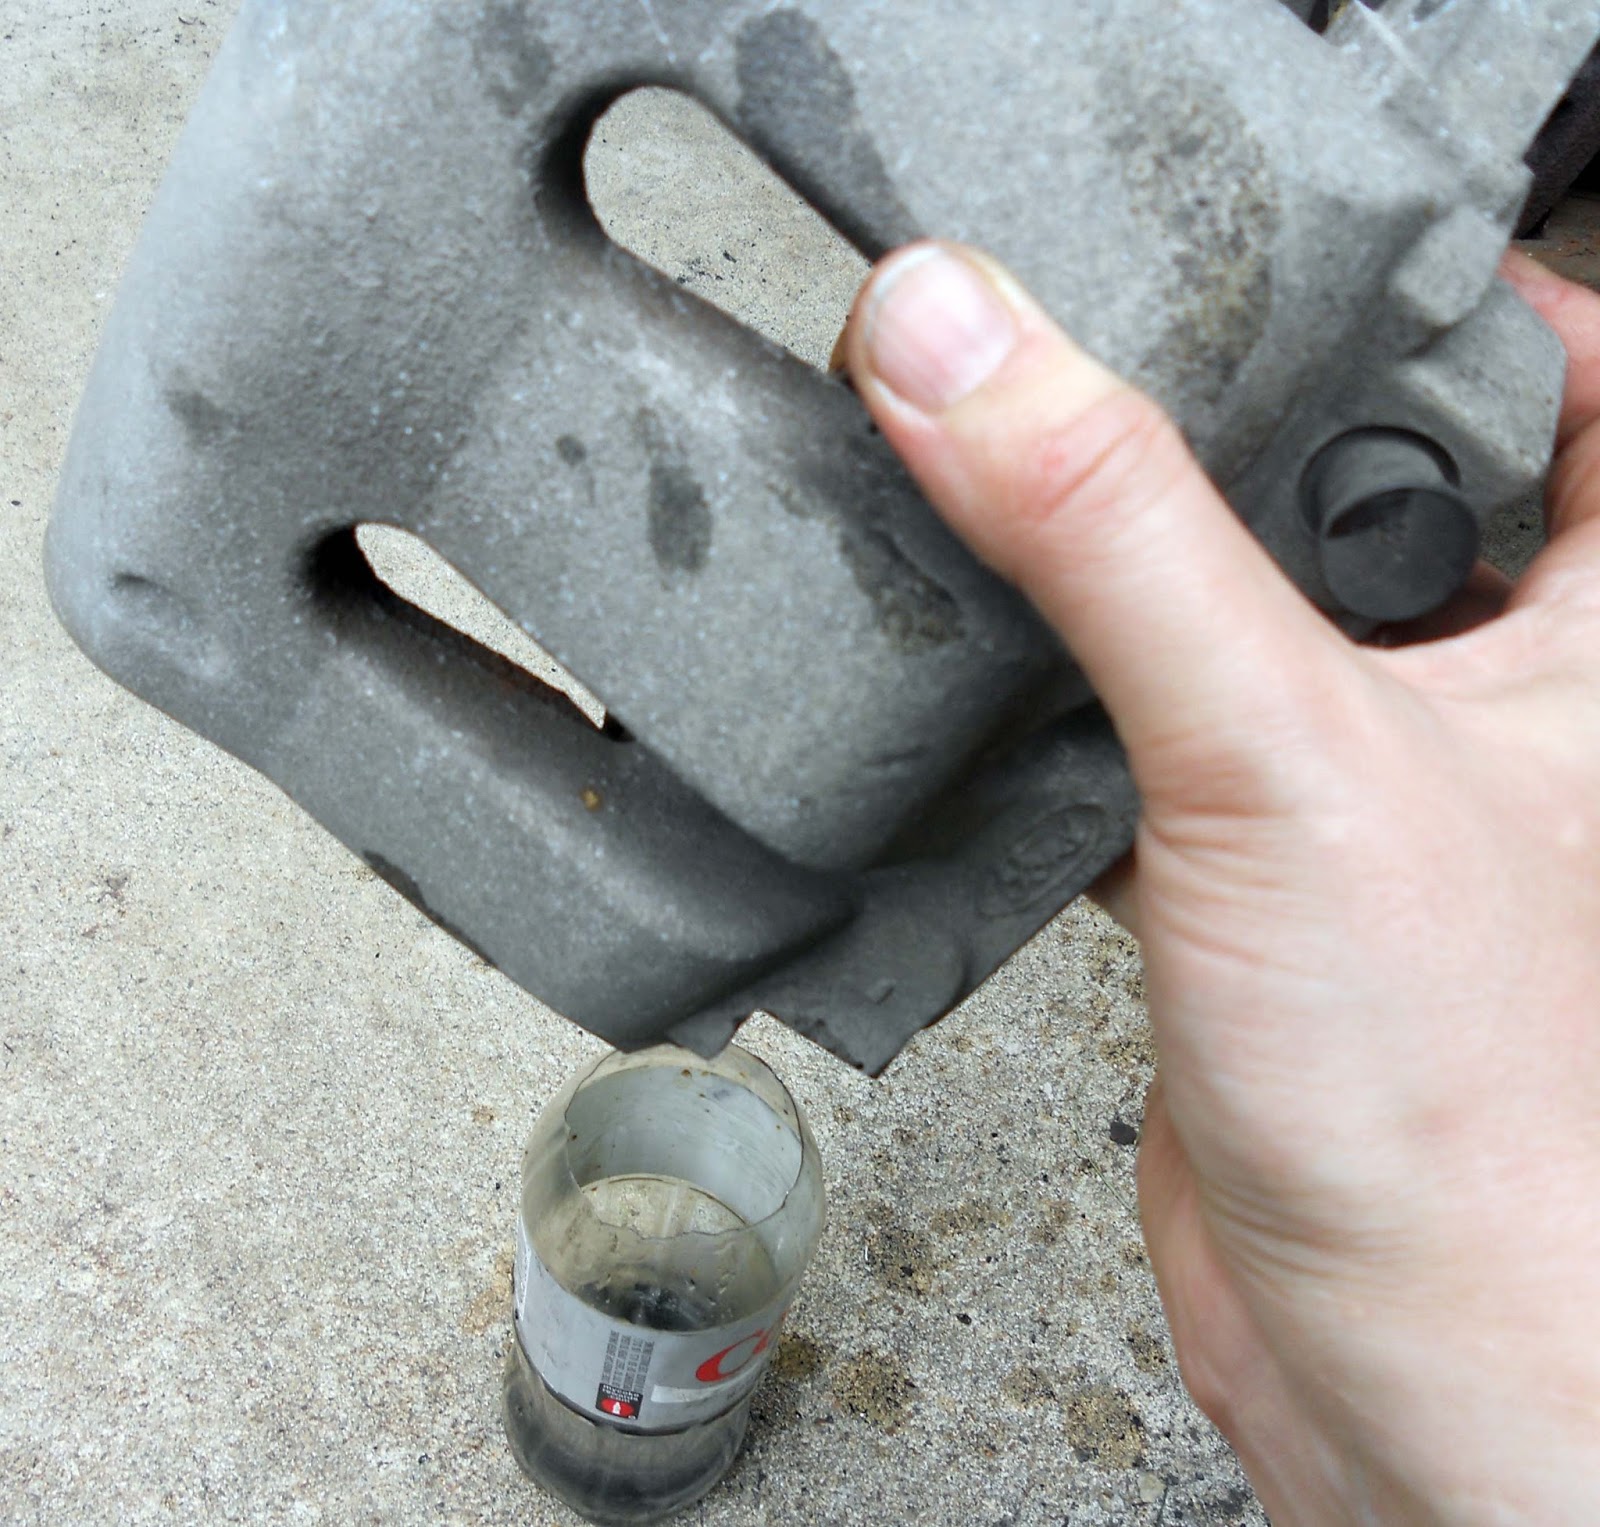
Before we remove the caliper, we’re going to loosen the bolt that holds the brake line to the caliper. This is located on the bottom side of the caliper. Be gentle with this bolt. It’s hollow, and if you manage to break it, you’re screwed until you get a new one. You should get some type of container to collect the brake fluid that’s going to seep out. I dug a Diet Coke bottle out of the recycling bin and chopped the top off for this purpose. You will probably even want to get a second container to collect the brake fluid that’s inside the caliper, too. I've placed the second picture here because it's showing you the brake line draining into my Diet Coke container.


Now the caliper. It’s held in place with a bolt at the top and bottom on the back side of the rotor. Use a ratchet or a box end wrench to unbolt both.


You may have to wiggle it a bit, but the caliper should pull free.

Now that the caliper is off, let’s make sure the fluid is drained from it.
Remove the brake pads -it’s not too hard, just wiggle it a bit if needed. * While we’re at it, lets take a quick look at our brake pads. In this case, these pads are still in great shape with plenty of thickness left for braking, so they don’t need to be replaced.


It’s easy to get new brake pads though. An auto parts store should have a variety to choose from. I prefer a ceramic compound that is better at transferring heat to keep your brakes from fading out on you.

Check the rotor, too. Run your finger across the surface of the rotor on both the front and back side. It should feel smooth on the surface area where the pad has contact with the rotor (the shiny area). If you feel ridges, you should pull the rotor off (which isn’t too hard now that you’ve removed the wheel and the caliper -we didn’t take off the caliper frame that holds the brake pads, but if we needed to take off the rotor, we would remove it. Anyway, before you spring for new rotors (also available at the auto parts store), you can see if you can get the rotor machined or ground down so it’s smooth again -often times, the auto parts store can do this or recommend somebody who can if you don‘t know anybody whose good for that job. If the rotor thickness is too thin, then you’ll have to buy a new one though.

What comes off the car eventually has to go back on. To make that task easier, snug one of the brake pads against the pistons and then put a C clamp on it and crank it down until the pistons are pushed back inside the caliper.


As long as we have the caliper off, I think we should spiff things up a bit. Just so happens that I have a can of caliper paint. Guess what that’s for!


Then spray away.

Before too long, you’ll have cherry red calipers to show for the effort -the auto parts store also had black and silver caliper paint, but silver was too close to what color the calipers already were, and black paint didn’t seem like it would pop the way I wanted it to. Decision via process of elimination, then.

We already took the pads off and had a good look at them, they won’t be due for replacement for a long time, so now it’s time to put them back on. Since they’re identical, I decided to flip flop them front to back, because, why not? I think of it like rotating tires, though this isn’t typically done. I just felt like doing it.


And just look at that shiny red caliper! Lets put it back on already. Remember those two bolts we removed earlier? Time to figure out where we stashed those and put them back in place.

It would probably be good if we reconnected that brake line, don’t you think? Remember, that bolt is hollow, so get it on there snug, but don’t torque it too tight, or it could break.

Would you look at that! Almost all back together!

Don’t think we’re done just yet. There’s still a matter of all that brake fluid that we drained from the calipers and the brake line, and all the air that’s occupying the space where it used to be. Now it’s time to pretend we’re medieval barbers and bleed this system! Hope you’ve got a friend to help you with this, or it’s a big pain.

First, remove the rubber cover from the brake bleeder.

Have your friend get inside the car and wait for your signal. When you tell them to, they’ll need to push the brake pedal all the way to the floor, then release and do that over and over again.

Start at the brake that’s the farthest distance from the brake fluid reservoir. This picture above is a shot of the brake fluid resevoir... it's that small white tub with the back cap. The cap usually contains helpful info about what kind of brake fluid to use, so make sure you figure that out before you dump just any old fluid into that reservoir.

Use a wrench to loosen the bleeder, then have your buddy push the pedal to the floor. Tighten the bleeder and have them let up on the pedal, then loosen and have them push to the floor, tighten and have them release. Repeat until you get brake fluid coming out of the bleeder valve instead of air.
You’ll need to keep topping off your brake fluid reservoir as you do this. Check it periodically while you're bleeding the system. Like I said before, make sure you’re using the correct type of brake fluid for your vehicle.

Do the same steps for bleeding the other brakes, then check again at the first brake you started at just to be thorough, because, why not? Make sure the reservoir is topped off, put the lid back on, and close the hood of the car.
Bolt the wheels back on the car, lower the car back to the ground, and you’re done.


Remember that anytime you take the wheels off your car, or even just one wheel, you need to torque those lug nuts again after driving the vehicle for about 50 miles. This is an important step that could be disastrous if skipped. By that, I mean, your wheel could go running off without the rest of your car while you’re driving. So, take the time to tighten those lug nuts.
No comments:
Post a Comment