Just a few months ago, I had LASIK surgery on my eyes, which took me from wearing contact lenses or glasses all the time to none at all. Think of head light restoration like LASIK, or actually, since the lenses are really clouded in this case, like cataract surgery. We're going to improve the car's vision in terms of how well it illuminates things for the driver, and its visuality in terms of how the car looks to people who have to look at its outward appearance. It's a little bit cosmetic and a little bit corrective, so we get to take down two birds with one stone in this case.
The word of the day is “cheap”, so, with that in mind, I ventured out to the Mecca of cheap tools and assorted stuff known as Harbor Freight Tools (source of about a dozen or more of the right angle grinders I've wrecked over the years with fiberglass work). This is where you go when you need a tool that you know you’re going to abuse, misuse, wreck, lose, or end up loaning to a friend who’s not apt to return it. Stuff is cheap and quality so-so, though sometimes, tools from Harbor Freight will surprise you with how long they hold up. To the automotive section I went. I found a genuine 3M brand headlight restoration kit for $20, but saw also that I could get the off brand (some brand called CCP) headlight lens repair kit packaged in a plastic baggie rather than slick blister pack like the 3M set (and made in the USA, no less) for $10. If you remember the word of the day, you can probably guess which one I bought.
$10 is actually overpriced for what you get with these kits. Basically, it’s a 3” sanding disc plate that attaches to a drill with two abrasive pads (one for each headlight), a little bottle of a mildly abrasive polishing gel, a buffing pad, and a folded up piece of paper with instructions on one side of it. Part by part, these components don’t add up to $10 worth of stuff. Maybe $3-$4 for the drill disc plate, and 50 cents a piece for the sanding discs and a dollar for the buffing disc plus another dollar for the itty bitty polishing compound bottle and we’re up to $5-6. I guess they figure their instructions and the plastic baggie make up for the rest. Oh well…

It just so happens that I have the Original Equipment Manufactured head light enclosures from my old Mustang. I bought and installed slightly tinted replacement enclosures like what the Mustang Cobras of its time featured, so the original factory enclosures were sitting around in my basement for a few years, just waiting for a project like this to come along, I suppose. The old lenses were super sandblasted from years of use, and actually were previously sanded down a bit with very mild grit sandpaper about a year ago, but never actually completed. What you’re seeing as our starting point actually looked a lot worse before. As you can tell by looking at the picture, the lenses are very cloudy from the scuffs and pitting on the outer plastic surface. This is no good, because that surface diffuses the light that is supposed to beam through it, making the headlights less effective. Plus, dull, sandblasted lenses make your car look crappy. Nothing will make them stand out more than a fresh wash and wax on the car, leaving the vehicle gleaming in the sunlight only to have the overall look ruined by those dull, cloudy headlight lenses. They need fixing, or they've just gotta go!
I also decided to give our system a spin on an old motorcycle helmet I picked up, because it's one thing to see from the outside what a kit like this can do, but perhaps another thing all together to see out from behind those restored lenses. The plastic was scuffed and scratched and not very clear, so I figured it couldn't hurt to try this restoration kit out on it. In fairness, I did use the same pads on this after I had used them on the headlights, so the results may differ from a scenario where fresh sanding pads are used.
Down to business. First, gather up your drill and attach the disc plate.

You’ll also need a spray bottle of water to mist the surface with as you work.

Now we start grinding away on our headlights. The instructions say to do this for a solid 3 minutes on each lens. I didn't time it, but I think I met that requirement.

After stage 1 sanding is done on the first headlight, you can see a bit of a difference between it and the thus far untouched headlight enclosure (the sanded one is on the bottom and the unsanded one is on the top).

It helps if you have a vice you can set up in your work area to hold this stuff still while you work with it. Also, try to do this in an area where you can clean up easily afterward, because that sanding disc is going to fling stuff everywhere. So now, we buff with the foam buffing pad and the polishing gel.

Now both lenses have been done, and the helmet as well. I don’t think they look as good as I’d like them to, though, and decide to add my own next step.

I happened to have some rubbing compound sitting around and tried it out on the helmet.

Then I applied rubbing compound to the headlight lenses, too. I just used the buffing pad that came with my kit to work it in.


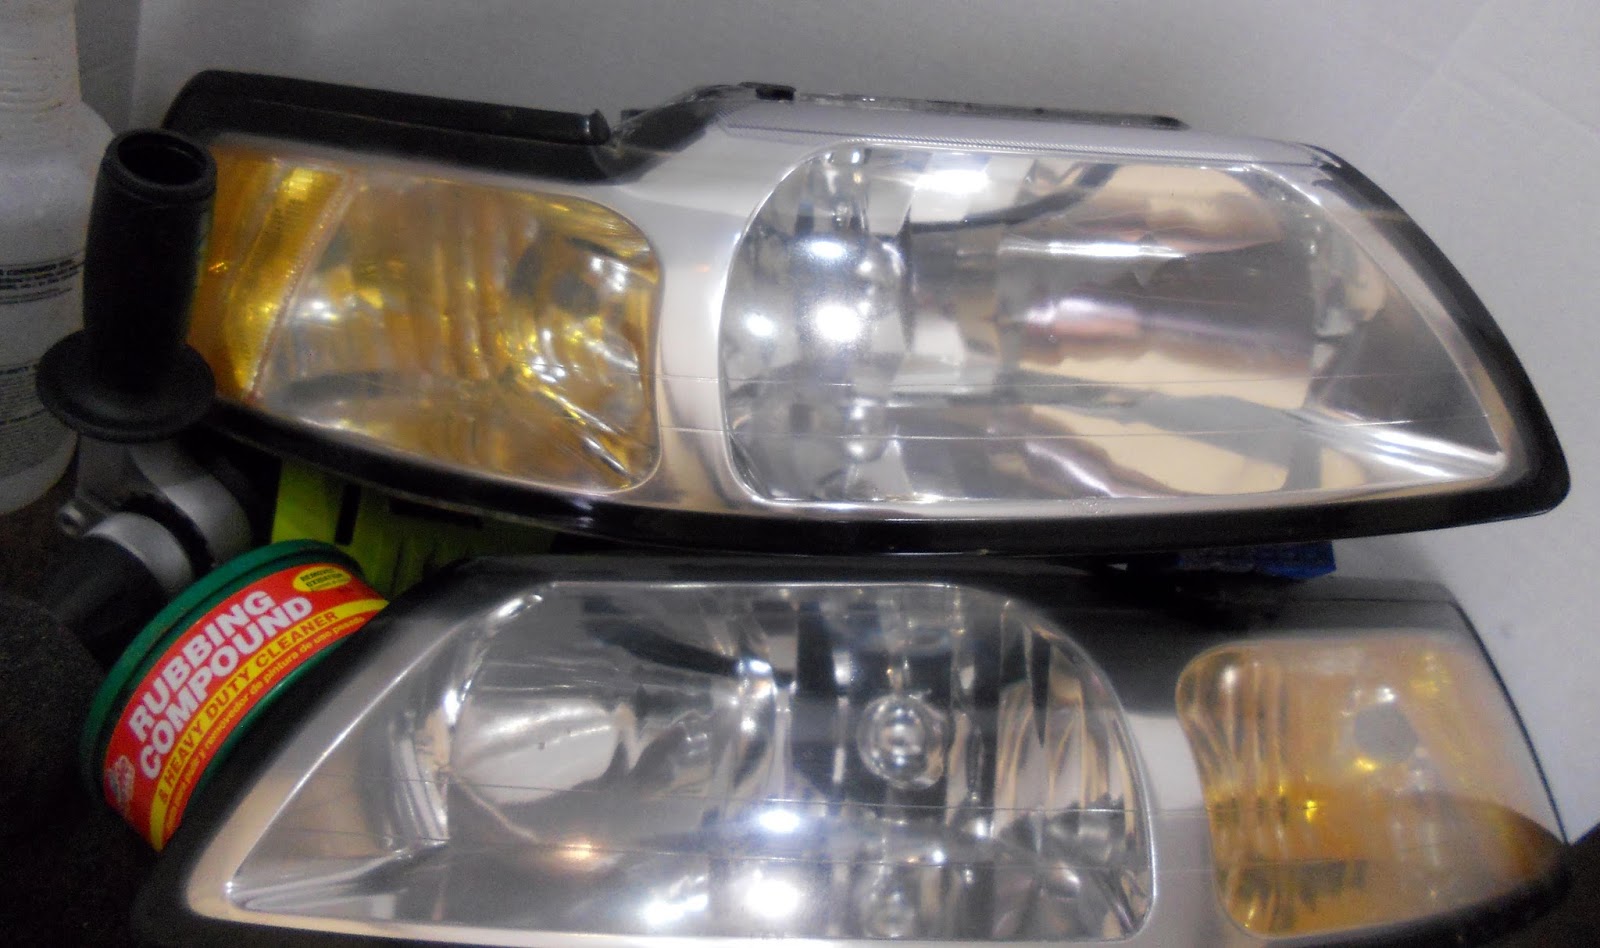
Here’s the difference. The bottom headlight was buffed with rubbing compound in addition to the stuff from the kit. The top headlight is just the finish that the kit leaves us with.
Now, they've both been gone over with the rubbing compound and a foam buffer pad on the drill plate.

Here’s the helmet at the best stage I could work it up to with what I had. For helmets, I would recommend either replacing the faceplate lens or buying a better and perhaps more expensive kit than the one I used, because I still found the view to be quite cloudy from behind the lens.

And here’s a side by side of what we started with vs. what we ended with. I think it's a significant improvement, though certainly not perfect. For $10, it's not bad. I can't help but wonder if the 3M kit would have been better. Because I don't have the car that these lenses go with any longer, $10 is about all I am willing to spend on it, though.

Hey, if anybody wants these OEM headlight enclosures (they should fit 1999-2004 Mustangs), drop me a message. I'll part with them for $25 each or $40 for both plus shipping if you're not in the MPLS area to pick them up.
No comments:
Post a Comment